This is the second part in a multi part blog post where the previous part is here:
We have a couple of message in the queue. Let’s pull them out. This is the design of these objects we did in the previous post:
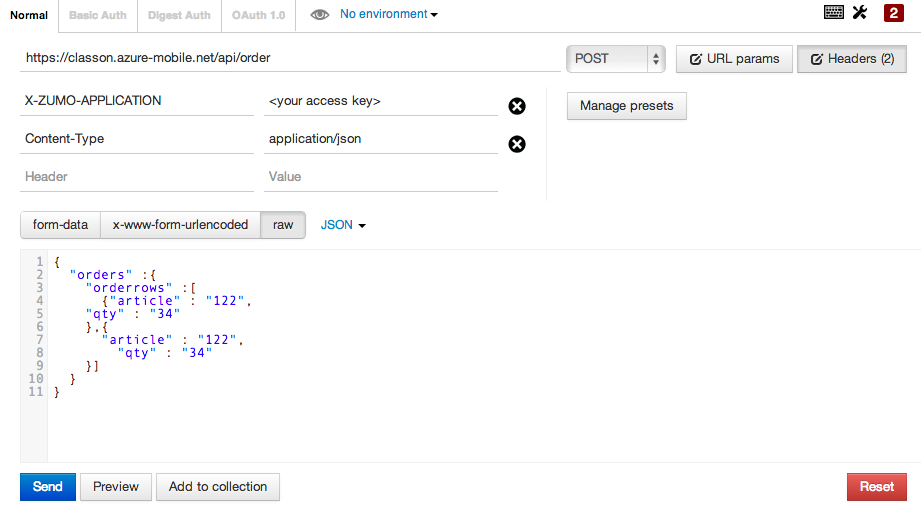
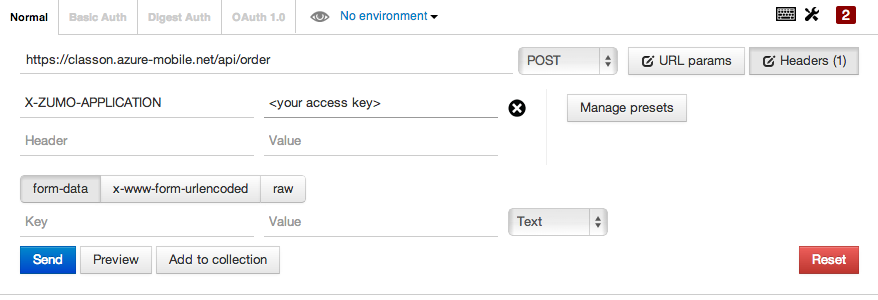
This is simulating a mobile application that can place orders of some kind.
To easily deserialize these into POCOs we create the container classes like this:
| [DataContract] | |
| class Order | |
| { | |
| public DateTime CreatedOn { get; set; } | |
| public List<OrderRow> Orderrows { get; set; } | |
| } | |
| [CollectionDataContract] | |
| class OrderRow | |
| { | |
| [DataMember] | |
| public string Article { get; set; } | |
| [DataMember] | |
| public int Qty { get; set; } | |
| } |
Using the same names and structure as the JSON-objects will make the transition very easy for the built-in Javascript deserializer we are going to use.
So, first of all go to the Azure portal and get the connection string to the queue. Click on the link at the bottom saying connection information.

In the following popup you click the “copy to clipboard“-icon to the right of the “ACS Connection string” box. There, now you have the connection to the endpoint in your clipboard.
The connection string goes right where it says in the following snippet
| string connectionString = "<your connectionstring here>"; | |
| var namespaceManager = NamespaceManager.CreateFromConnectionString(connectionString); | |
| if (!namespaceManager.QueueExists("orderqueue")) | |
| { | |
| namespaceManager.CreateQueue("orderqueue"); | |
| } | |
| var Client = QueueClient.CreateFromConnectionString(connectionString, "orderqueue"); | |
Here you get an instance of the NamespaceManager and then use it to check if the queue exists or, otherwise, create it. Orderqueue is the name we chose in the previous sample. Change to whatever your queue is called.
If everything is fine we go ahead and create the QueueClient pointing straight at our queue.
So, that’s all the setup needed.
Let’s go get some object then. Now, remember this example is overly simplified. It’s just blocking forever until a message arrives. It could very well that be you want some timeouts to act upon. The Client.Receive() optionally takes a TimeSpan for specifying the time to wait, just as in the MSMQ counterpart.
You perhaps also would like to check out the Async-methods and see if they better suit your needs. This sample is suitable for a Windows Service or any non-server application where you control the flow. I’m just using one thread for the loop so it’s fine.
| while (true) | |
| { | |
| BrokeredMessage message = Client.Receive(); | |
| if (message != null) | |
| { | |
| try | |
| { | |
| var msgStream = message.GetBody<Stream>(); | |
| StreamReader sr = new StreamReader(msgStream); | |
| var order = new System.Web.Script.Serialization.JavaScriptSerializer() | |
| .Deserialize<Order>(sr.ReadToEnd()); | |
| if (order != null) | |
| { | |
| order.CreatedOn = message.EnqueuedTimeUtc; | |
| //Act on order | |
| } | |
| message.Complete(); | |
| } | |
| catch | |
| { | |
| message.DeadLetter(); | |
| } | |
| } | |
| } |
A few comments on the code. The BrokeredMessage contains a lot of metadata that you normally would like to extract. I’m just using the EnqueueTime as a sample. One interesting property is DeliveryCount. This is the number of time this message has been picked up for delivery but then just dropped (or at least not completed). SequenceNumber is another one. This can be used to check the ordering of the received messages if that is important in your application.
Ok. We have the message received alright. Since we didn’t go for the xml formatting but used JSON instead, we cannot use just a one-liner for the deserialization. Instead we take the body in the form of a Stream. Remember, the GetBody-method checks for the property “body” in the message
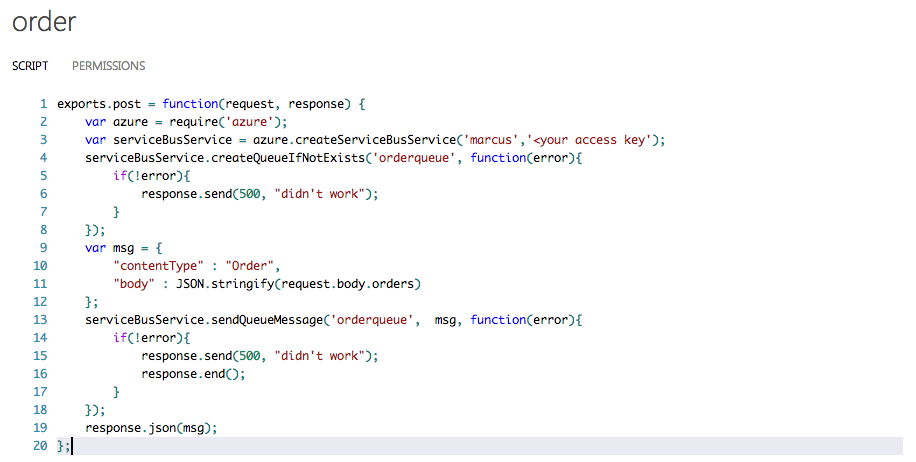
As you see on line 11 we add a property named “body” to hold the user request.
Now with the stream at hand, we wrap it in a StreamReader just so we don’t need to fiddle around with byte arrays but instead just use the nifty ReadToEnd to get the whole payload as a string. This string we then pass into the JavaScript serializer and tell it to deserialize our string to an Order instance. If all this went ok we send a signal to the queue that we are done with the message and it’s ok to delete it. This is done with Complete().
An excerpt from the documentation:
“Completes the receive operation of a message and indicates that the message should be marked as processed and deleted.”
And in our catch we just send it to the deadletter queue where all the garbage ends up. A bit crude but in this sample it is fine.
A few notes at the end:
In the Azure Portal you can set the default behaviour of the queuelike the DeliveryCount I mentioned.

But also, and this is a tip, the lock duration. When you pull the message out of the queue to process it, you have the amount of time specified here at your disposal. After that time has elapsed the message is unlocked and any message.Complete() after that will fail. The DeliveryCount will be increased on the message and it is ready to be retrieved again (by you or another application). I’m mentioning this because during debugging you will probably want to increase this to a very large number to avoid problem.
Another tip to make this work is that you will have to install the Azure SDK to get it to compile. Nowadays this is done preferably through NuGet.
Right-click on your project, select “Manage NuGet packages…” and search for “service”. There you will find the Azure Service Bus SDK. Click install and you are good to go.