Windows Azure Mobile Services (WAMS) has been around for a while by now but the bandwagon has rolled out some significant improvements lately so it’s time to revisit. The perhaps most interesting (and enabling) change is the “Custom API”-feature. Until now, WAMS, was limited to acting as a CRUD-backend to your apps. Now, with Node.js as server language, we can develop “real” applications.
This is me spelunking with these features….
For completeness I’m starting from scratch
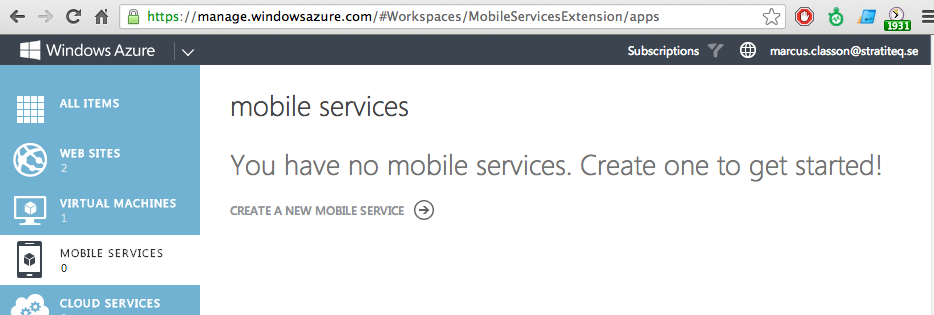
Create your WAMS application
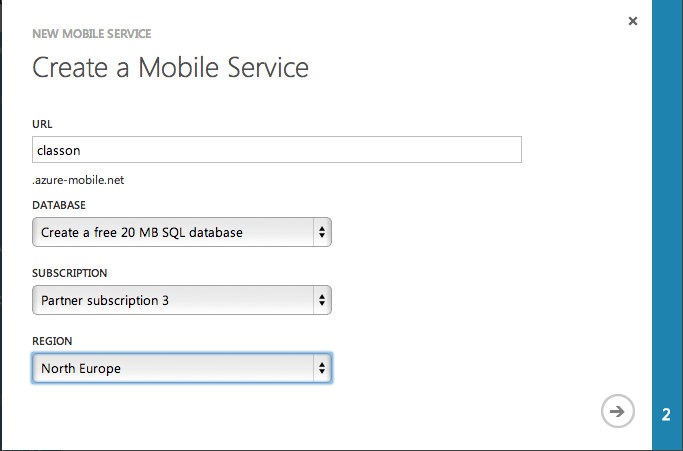
Fill in the form. Sample below:
Now you should have an application created for you.

Now, the cool thing here is that Microsoft actually will create a boilerplate project for you with all the blanks filled in. Just select technology and download.
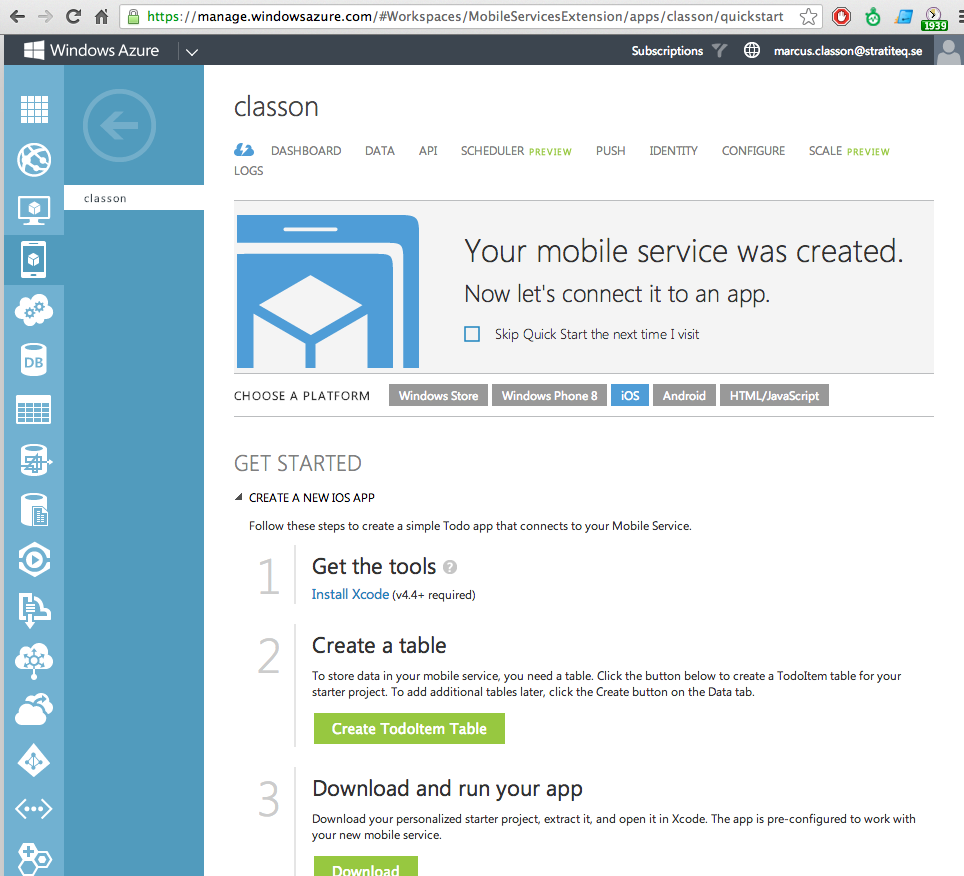
However, I will not use these boilerplates. I want to play around with the Custom API feature.
Create the Custom API
Just select API in the top menu and then click Create at the bottom. You should see this dialog now:
 We will see the implications of the different permissions later on. Just leave them for now. After finishing this step the api is created and you are presented with the stub below

Testing the API
The simplest way to test the new API is through either Fiddler if you are on a Windows box, or with the cross platform Chrome-app Postman. Open a new tab in Chrome and click on “Web store” in the lower right corner. Search for “postman” and download.
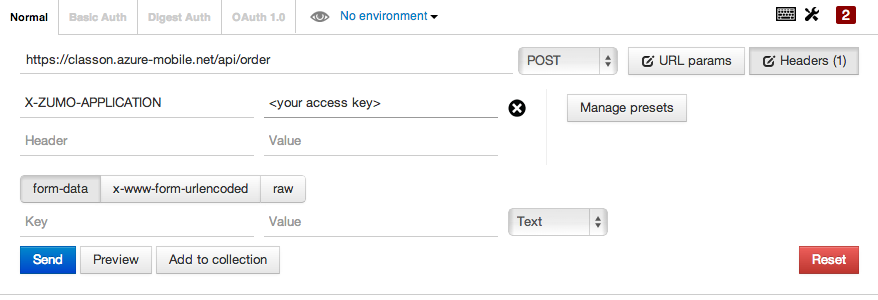
In postman you just type your URL for the api where it says “Enter request URL here” and change the verb from GET to POST.
So, I paste my URL https://classon.azure-mobile.net/api/order and change to POST and press Send.
And… I receive a 401 Unauthorized.

Why? Because as you remember from above the default permissions was “Anybody with the application key” and we didn’t provide one.
So, click on the Headers tab in Postman (top right). And enter X-ZUMO-APPLICATION as the name and paste in your application key as value. Now, when you Send you should get the 200 Hello World response.
Well then, what’s next?
To up the stakes a bit we’ll try to combine other Azure parts as well. Let’s combine this with the Service Bus….
Go to the Service Bus section of the azure management portal and click “Create”. Type in a name of your namespace as it is called. Give it a name and select the same region as you did with the Mobile Service. So, done.
To access this “bus” we need two things; the name and the access key. To get the key you click at the bottom where it says “Connection Information”. A dialog with a lot of connection stuff pops up. Press the copy-icon to the right of “Default key” to copy your key to the clipboard. Paste it somewhere where you can find it as we are going to be needing it when we continue to develop our api.
Connecting Mobile Services to Service Bus
Now, modify the api-script like so:
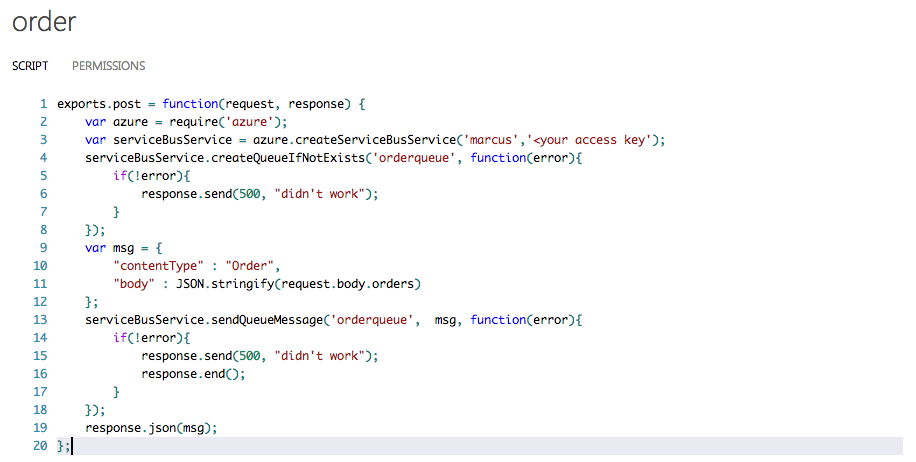
What is happening here? Well, at line 2 we are using require to get an instance of the azure-sdk for Node.js. Line 3 is actually creating a reference to our Service Bus-namespace (in my case ‘marcus’). Here, as the second parameter, is where your key should go. The rest is kind of self explanatory. CreateQueueIfNotExist does just that. The first time it accessed the queue will be created. At line 9 I’m composing the message I’m going to send to our backend and the at 12 it flies away.
A few caveats: the properties of the message are not arbitrary. The ‘body’-tag will be handled as the actual body of the BrokeredMessage.
More about reading the message in C# in a later post.
Testing the api with a JSON workload
In our previous test we didn’t use any workload. Hence the lack of Content-Type in the headers. So, modify (in Postman) the request like so:
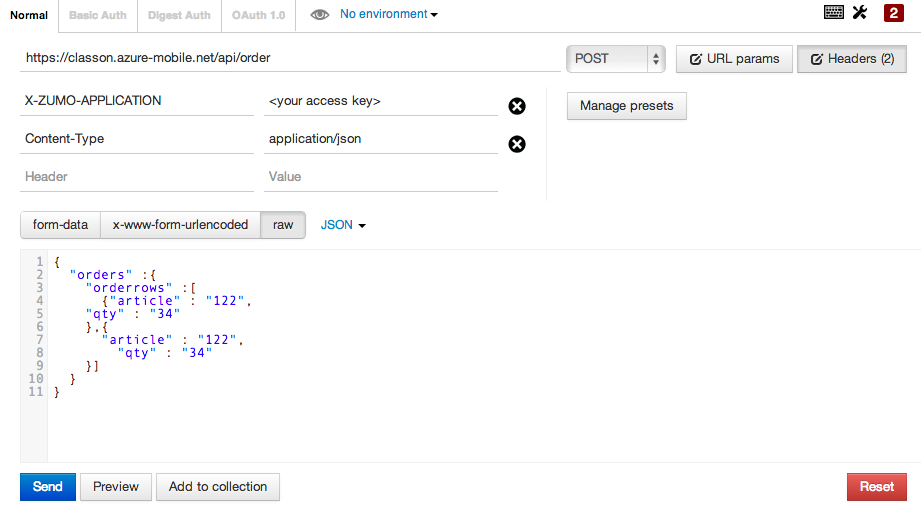
Edit: Updated payload to contain a collection of items. This way the receiving end will be cooler…
Press send and you receive something like this:

To see that the message didn’t just disappear but really ended up in the queue, go to the Service Bus section again and open your namespace.
You should now have a ‘orderqueue’ with a length other than 0

From here it is just to consume the queue from where ever you prefer.
